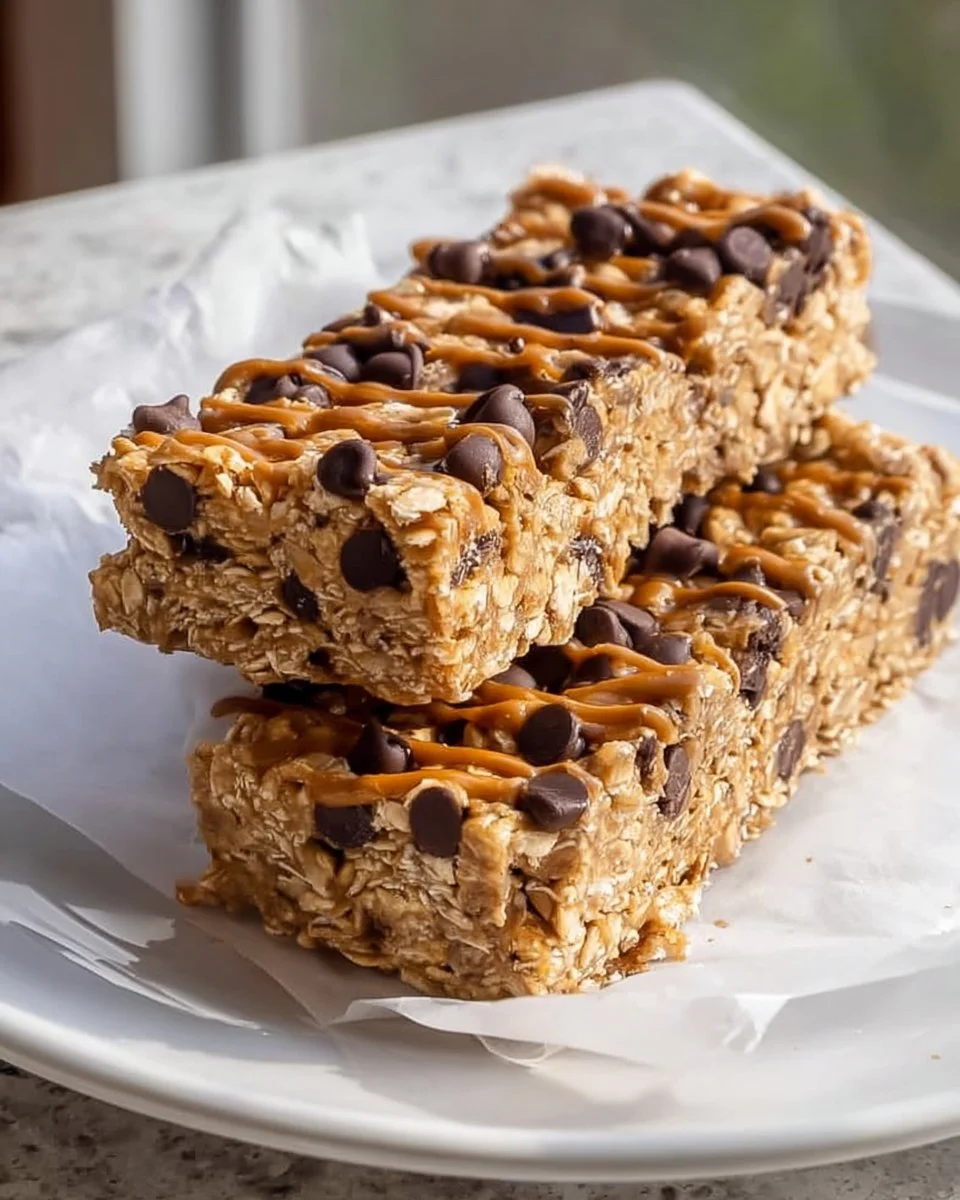
The morning sun peaks through your kitchen window, casting a warm glow on the countertop filled with simple yet enticing ingredients. As you gather your materials for homemade oat granola bars, the inviting aroma of warm, comforting oats fills the air. A gentle, earthy scent coalesces with the rich sweetness of honey or maple syrup, promising mouthwatering joy in every bite. The thought of crisp-edged bars with a soft, chewy center beckons you closer, igniting your taste buds with a melody of flavors.
Imagine biting into a bar studded with creamy nut butter, a blissful crunch from chopped nuts, and delightful little pockets of melty chocolate chips. Each mouthful envelops you in a moment of bliss, whether enjoyed as a quick breakfast or a guilt-free afternoon snack. These oat granola bars embrace you with their hearty texture and satisfying richness, embodying a familiarity that feels like a warm hug at dawn. The experience is not just about nourishing your body but about indulging in a moment of homemade goodness, where every element sings in harmony.
Why You’ll Love This Oat Granola Bar Recipe
These oat granola bars shine brightly in the crowded world of snacks, bringing together health and indulgence like no other. Imagine biting into a bar that energizes you for the day, combining the wholesome benefits of oats—rich in fiber and protein—with the delightful tastes of nut butter and chocolate. Perfect for a quick breakfast on busy mornings, a post-workout recharge, or a satisfyingly sweet treat in the afternoon, this recipe brings versatility paired with convenience.
Each bite offers a lovely crunch followed by a melt-in-your-mouth experience, creating a symphony of textures you won’t want to miss. Unlike store-bought varieties, which often hide additives and preservatives, these oat granola bars are crafted with love, allowing you to enjoy each flavor in its purest form. You have full control over what goes into your bars, ensuring they fit your lifestyle and cravings perfectly.
Preparation Phase & Tools to Use
Crafting these delectable granola bars requires just a few essential tools, making it an enjoyable and straightforward process.
-
Mixing Bowl: A large mixing bowl allows room for all ingredients to blend harmoniously. Opt for a sturdy bowl that can withstand some serious mixing.
-
Spatula or Wooden Spoon: Choose a spatula or wooden spoon for mixing; this ensures you combine the ingredients thoroughly, avoiding any stubborn spots that could disrupt the taste.
-
8×8 Inch Baking Dish: This size is perfect for creating bars that are not too thick yet maintain a satisfying chewiness. Line it with parchment paper for effortless removal and cleaning.
-
Refrigerator: A reliable fridge is your best friend here. It ensures your bars set properly, transforming from a gooey mixture to a solid treat brimming with flavor.
Practical Preparation Tips
- Measure your ingredients precisely for consistent results.
- Melt the nut butter slightly in the microwave for easier mixing.
- Keep your hands slightly damp when pressing the mixture into the baking dish to prevent sticking.
Ingredients for Oat Granola Bars
-
2 cups rolled oats: The heart and soul of your bars, rolled oats provide a delightful texture and are packed with nutrients.
-
1 cup honey or maple syrup: Both options deliver natural sweetness; honey offers a floral note, while maple syrup provides a more robust flavor profile. You can also use agave syrup as a vegan option.
-
1/2 cup nut butter (like peanut or almond): Rich and creamy, nut butter lends a decadent taste, adding to the overall chewiness and binding all ingredients.
-
1/2 cup mini chocolate chips: These contribute melty pockets of sweet indulgence; feel free to substitute with dried fruits such as cranberries or apricots if you prefer a fruity twist.
-
1/4 cup chopped nuts or seeds (optional): Toss in chia seeds, pumpkin seeds, or walnuts for added texture and nutritional value.
-
1/2 teaspoon vanilla extract: The essence of vanilla enhances the overall flavor, creating comforting notes that make each bite feel extra special.
-
A pinch of salt: A tiny touch of salt elevates sweetness, balancing flavors beautifully.
How to Make Oat Granola Bars
-
Combine Ingredients: In a large bowl, mix together the rolled oats, nut butter, honey or maple syrup, vanilla extract, and a pinch of salt until well combined. Use your spatula to ensure every oat glistens with the sticky mixture.
-
Add Chocolate Chips and Nuts: Stir in the mini chocolate chips and any optional nuts or seeds, distributing these treasures evenly throughout the mixture.
-
Prepare Your Dish: Line an 8×8 inch baking dish with parchment paper, leaving some edges hanging for easy removal later. This step is crucial for a clean finish.
-
Press the Mixture Firmly: Transfer the mixture to the prepared dish and press it down firmly with your spatula or hands. This step is key to getting that perfect texture; the firmer, the better.
-
Chill to Set: Refrigerate for at least an hour until firm. The chilling process allows the bars to set perfectly—patience is essential!
-
Cut and Enjoy: Remove the bars from the dish using the parchment paper. Cut into squares or rectangles, and indulge in the wholesome goodness.
Chef’s Notes & Helpful Tips
-
Make-Ahead Tips: Prepare a double batch over the weekend, cutting them into bars and storing them in an airtight container. They make excellent snacks for the week ahead.
-
Cooking Alternatives: Use an air fryer if you prefer a crispier texture. Cook at 300°F (150°C) for approximately 10-12 minutes, but be cautious; they can brown quickly.
-
Customization Ideas: Personalize with spices like cinnamon or nutmeg, or swap in your favorite mix-ins—think coconut flakes, dried fruit, or seeds.
Common Mistakes to Avoid
-
Too Much Liquid: Adding extra honey or nut butter can lead to overly sticky bars. Stick to the measurements for the perfect consistency.
-
Under-pressing the Mixture: Not pressing the mixture firmly enough may lead to crumbly bars. Ensure you pack it down to compact the ingredients.
-
Skipping the Refrigerator Step: The cold helps your bars hold together. Skipping this might result in bars that fall apart easily.
What to Serve With Oat Granola Bars
- Pair with a dollop of Greek yogurt for a protein boost and creamy texture.
- Enjoy alongside fresh fruit—berries or banana slices complement the sweetness beautifully.
- Serve with a warm cup of tea or coffee, enhancing the experience of your snack.
- Crumble over a bowl of smoothie to add delightful crunch.
- Add cottage cheese or ricotta on the side for a creamy element.
- Pair with a dollop of nut butter for an extra satisfying combo.
- Dip in melted dark chocolate for an indulgent treat.
- Create a fun dessert charcuterie board with your granola bars leading the way.
Storage & Reheating Instructions
Store your oat granola bars in an airtight container in the fridge for up to a week. For longer storage, freeze them; they will maintain their taste and texture for up to three months. When ready to enjoy, simply remove them from the freezer and let them thaw at room temperature. You can also pop them in the microwave for a few seconds to enjoy that fresh-out-of-the-kitchen warmth.
Estimated Nutrition Information
Each oat granola bar contains approximately 150 calories, 5g of protein, 7g of fat, 24g of carbohydrates, and 3g of fiber. Nutritional values can vary based on specific ingredients used, so consider this a guideline.
FAQs
1. Can I make these bars without nut butter?
Absolutely! You can substitute nut butter with sun butter or coconut oil if you prefer a nut-free option.
2. Are these bars gluten-free?
Yes, simply opt for certified gluten-free oats to ensure they remain gluten-free.
3. How can I make these bars vegan?
Use maple syrup instead of honey and select a vegan-friendly chocolate.
4. Can I bake these granola bars instead of chilling them?
While the bars are traditionally chilled, you can bake them at 350°F (175°C) for about 15-20 minutes for a different texture. Just ensure they cool completely before serving.
5. What is the best way to cut these bars?
Use a sharp knife lightly coated with cooking spray to easily slice through the bars without crumbling them.
With a warm heart and excited hands, you stand ready to make these lush oat granola bars. Every step in this beautiful journey creates delicious moments filled with flavor, joy, and the rich satisfaction that only homemade food can deliver. Do yourself a favor: grab those oats, gather the ingredients, and let your kitchen come alive with the aroma of love and care baked into every bar. Indulge now in pure bliss—one oat granola bar at a time.
Print
Oat Granola Bars
- Prep Time: 10 minutes
- Cook Time: 0 minutes
- Total Time: 70 minutes
- Yield: 12 servings 1x
- Category: Snack
- Method: No-Bake
- Cuisine: American
- Diet: Vegetarian
Description
Delicious oat granola bars packed with wholesome ingredients, perfect for breakfast or a snack.
Ingredients
- 2 cups rolled oats
- 1 cup honey or maple syrup
- 1/2 cup nut butter (like peanut or almond)
- 1/2 cup mini chocolate chips
- 1/4 cup chopped nuts or seeds (optional)
- 1/2 teaspoon vanilla extract
- A pinch of salt
Instructions
- Combine Ingredients: In a large bowl, mix together the rolled oats, nut butter, honey or maple syrup, vanilla extract, and a pinch of salt until well combined.
- Add Chocolate Chips and Nuts: Stir in the mini chocolate chips and any optional nuts or seeds, distributing these treasures evenly throughout the mixture.
- Prepare Your Dish: Line an 8×8 inch baking dish with parchment paper, leaving some edges hanging for easy removal later.
- Press the Mixture Firmly: Transfer the mixture to the prepared dish and press it down firmly with your spatula or hands.
- Chill to Set: Refrigerate for at least an hour until firm.
- Cut and Enjoy: Remove the bars from the dish using the parchment paper. Cut into squares or rectangles, and indulge!
Notes
Store in an airtight container in the fridge for up to a week or freeze for longer storage.
Nutrition
- Serving Size: 1 bar
- Calories: 150
- Sugar: 10g
- Sodium: 50mg
- Fat: 7g
- Saturated Fat: 1g
- Unsaturated Fat: 5g
- Trans Fat: 0g
- Carbohydrates: 24g
- Fiber: 3g
- Protein: 5g
- Cholesterol: 0mg