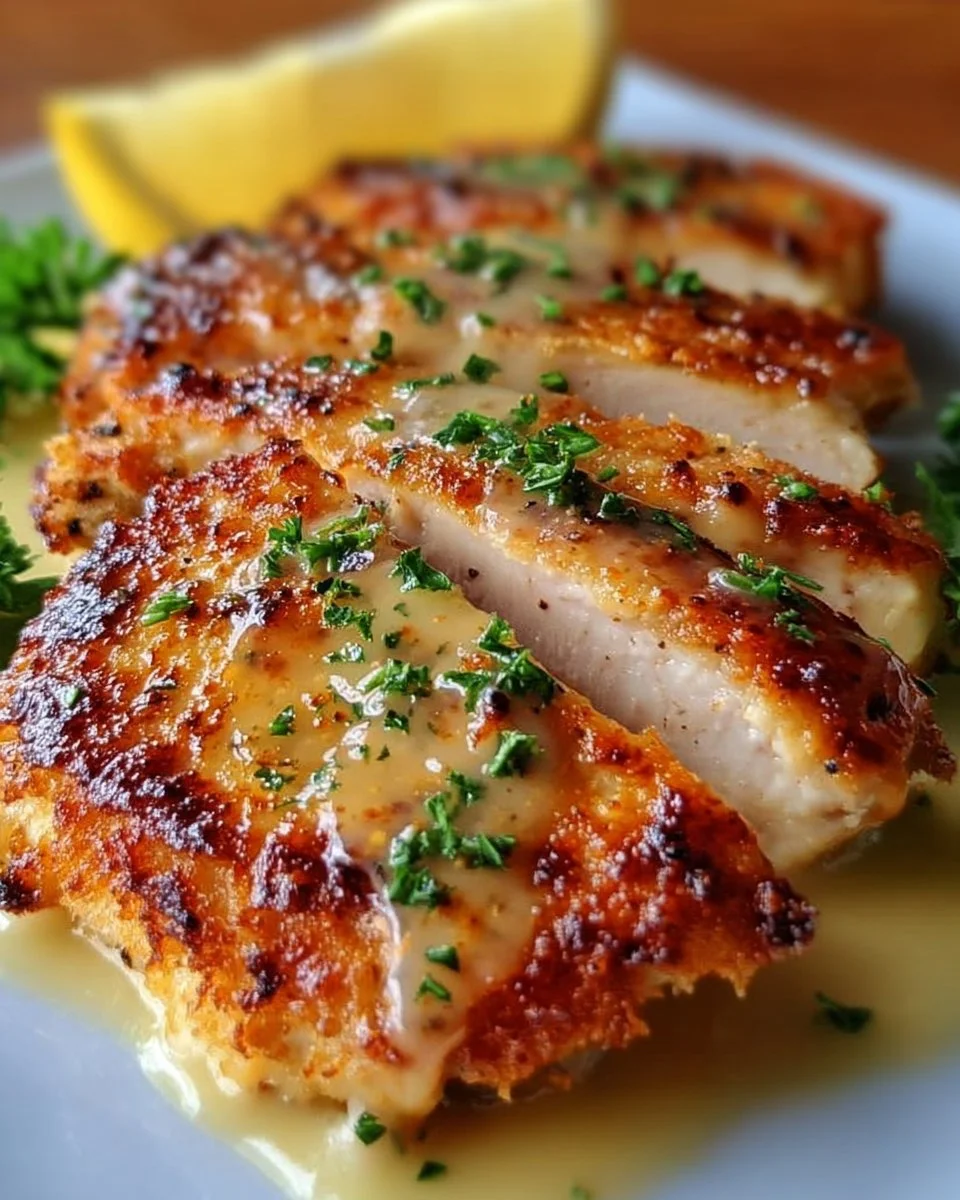
Imagine walking into your warm kitchen, the air filled with a savory aroma that beckons you closer. The sizzle of chicken frying in olive oil harmonizes with the sweet smell of Swiss cheese melting gently over a slice of salty ham, creating a symphony of flavors that promises a delightful dinner ahead. Each bite of this Golden Crispy Malibu Chicken offers a crunchy exterior, giving way to juicy, tender chicken wrapped around a rich, cheesy filling. It’s not just a meal; it’s an experience that transforms ordinary evenings into something special.
The contrast of textures delivers a delightful surprise—an initial crunch from the golden panko coating, followed by the creamy warmth of cheese and the subtle saltiness of ham enveloping the succulent chicken. With each slice, you reveal the beautiful layers, enticing your senses and inviting you to dive in for a second serving. This dish radiates comfort, making it perfect for cozy family dinners or when entertaining guests with an impressive dish that requires minimal fuss.
Why You’ll Love This Golden Crispy Malibu Chicken
Golden Crispy Malibu Chicken stands out for several reasons. First and foremost, the beautiful flavor combination of savory ham and creamy Swiss cheese stuffed inside tender chicken creates a deliciously satisfying meal that leaves everyone craving more. It shines on various occasions, from casual weeknight dinners to festive holiday gatherings, becoming a centerpiece that steals the show.
Additionally, this recipe is not only simple to prepare but also incredibly versatile. Whether you’re looking to impress dinner guests or simply want a comforting meal for your family, this dish fits the bill perfectly. The crispy crust adds a delightful crunch, while the juicy center bursts with flavor. With each mouthful, you experience the joy of a well-cooked meal that feels both indulgent and nourishing.
Preparation Phase & Tools to Use
To create the perfect Golden Crispy Malibu Chicken, having the right tools makes all the difference. Gather the following kitchen essentials:
- Cutting Board: A sturdy surface allows for efficient preparation of your chicken and fillings.
- Sharp Knife: Ensures clean cuts and easy handling, particularly when slicing chicken breasts for the ham and cheese.
- Measuring Cups & Spoons: For precise ingredient measurement, ensuring your flavors balance beautifully.
- Large Skillet: The right size skillet is essential for frying the chicken evenly without overcrowding, achieving that golden brown crust.
- Oven-safe Baking Dish: This keeps your chicken warm while it finishes cooking in the oven, ensuring it remains moist and tender.
Before diving into preparation, make sure to create a clean workspace, keeping your ingredients close by. A little organization saves you time and makes cooking a fun, enjoyable experience.
Ingredients for Golden Crispy Malibu Chicken
- 4 boneless, skinless chicken breasts: The star of our dish, tender and perfect for rolling.
- 4 slices of ham: Adds a salty, savory punch that complements chicken beautifully.
- 4 slices of Swiss cheese: Melts perfectly to bring creamy, rich flavor.
- 1 cup panko breadcrumbs: Provides the incredible crunch that elevates this dish.
- 1/2 cup all-purpose flour: Forms a base layer, creating a crunchier finish when fried.
- 2 eggs, beaten: Acts as a binding agent for the breadcrumbs, ensuring every chicken roll is perfectly coated.
- Salt and pepper to taste: Simple seasonings that enhance all the other flavors.
- Olive oil for frying: Gives the chicken a beautiful, golden crisp without overwhelming the flavor.
- Fresh parsley for garnish (optional): A sprinkle adds a pop of color and freshness before serving.
For those with dietary restrictions, consider swapping out the cheese for a dairy-free alternative or using turkey ham for a lighter option without sacrificing flavor.
How to Make Golden Crispy Malibu Chicken
-
Preheat your oven to 375°F (190°C). This step ensures everything bakes evenly once you transfer the chicken.
-
Season the chicken breasts with salt and pepper on both sides. Simple yet effective, seasoning at this stage enhances the chicken’s natural flavor.
-
Place a slice of ham and a slice of Swiss cheese on each chicken breast. Roll tightly, securing with toothpicks—this keeps the delicious filling inside as it cooks.
-
Dredge each rolled chicken in flour, ensuring each piece gets a light coating before dipping into the beaten eggs. The egg wash creates a sticky base that helps the panko adhere better.
-
Roll in panko breadcrumbs until fully coated. This is where the magic happens; the panko will give your chicken that irresistible crunch.
-
Heat olive oil in a large skillet over medium heat. Fry the chicken rolls for about 3-4 minutes on each side, or until they’re beautifully golden brown. Don’t rush this step; it’s pivotal to get that lovely crust.
-
Transfer the browned chicken to a baking dish and bake in the preheated oven for 20-25 minutes, or until the chicken is cooked through (the internal temperature should reach 165°F/74°C).
-
Remove toothpicks and garnish with fresh parsley before serving. This adds an enticing visual appeal and a hint of freshness.
Chef’s Notes & Helpful Tips
-
Make-ahead tips: You can prepare the chicken rolls a few hours in advance. Simply assemble and refrigerate until ready to fry and bake. This often infuses the flavors more deeply.
-
Cooking alternatives: Consider using an air fryer for a healthier version. Cook at 375°F (190°C) for about 15-20 minutes, flipping halfway for even cooking.
-
Customization ideas: Feel free to get creative! Add spinach for a pop of color or try different cheese varieties like mozzarella or cheddar for a unique twist.
Common Mistakes to Avoid
Avoiding a few common pitfalls will help ensure your Golden Crispy Malibu Chicken turns out perfect every time.
-
Under-seasoning: Don’t skip the salt and pepper—season both the chicken and the breadcrumbs for maximum flavor.
-
Overcrowding the skillet: Frying too many chicken rolls at once will lower the oil temperature, preventing that crispy finish you crave. Fry in batches if necessary.
-
Skipping the toothpicks: Make sure to secure the rolls. Unsecured chicken can unravel during cooking, ruining the pleasing presentation.
-
Not letting the oil heat properly: Always ensure your oil is hot enough before adding the chicken. A properly heated pan creates a beautiful crust.
What to Serve With Golden Crispy Malibu Chicken
Pair your Golden Crispy Malibu Chicken with sides that complement its savory richness. Consider these fantastic additions:
-
Garlic Mashed Potatoes: Their creamy texture pairs wonderfully with the crunch of the chicken.
-
Steamed Broccoli: A healthy, vibrant green that brightens the plate and adds a slight crunch.
-
Caesar Salad: Crisp romaine with tangy dressing provides a refreshing contrast.
-
Roasted Asparagus: Slightly charred, seasoned spears elevate the meal’s elegance.
-
Rice Pilaf: Fluffy grains absorb the chicken’s flavors beautifully, rounding out the dish.
-
Mac and Cheese: For a comforting, indulgent twist, this fan-favorite side never disappoints.
-
Coleslaw: The crunch and creaminess balance the richness of the chicken.
-
Corn on the Cob: Sweet, buttery corn is a classic combo that adds a delightful burst of flavor.
Storage & Reheating Instructions
To keep your Golden Crispy Malibu Chicken fresh, let it cool completely before storing. Place any leftovers in an airtight container in the fridge, where they’ll last up to 3 days.
For longer storage, wrap individual portions tightly and freeze for up to 3 months. When it’s time to enjoy again, reheat in the oven at 375°F (190°C) until warmed through, about 15-20 minutes, to maintain that coveted crunch. Avoid microwaving, as this can lead to a soggy exterior.
Estimated Nutrition Information
Each serving of Golden Crispy Malibu Chicken packs approximately:
- Calories: 380
- Protein: 30g
- Carbohydrates: 30g
- Fat: 18g
(These values are approximate and can vary based on ingredient brands and cooking methods).
FAQs
-
Can I use chicken thighs instead of breasts?
Absolutely! Chicken thighs provide richer flavor and remain very moist, making them a perfect alternative. -
What should I do if I have leftover chicken?
Enjoy it! The chicken reheats beautifully. Consider slicing it over a salad for a quick lunch or enjoying it with a side of veggies for a cozy dinner. -
Is it necessary to fry before baking?
Frying before baking creates a deliciously crispy crust, but you can bake right away if you prefer a healthier version. Just expect a softer texture. -
Can I make this dish gluten-free?
Yes! Substitute the panko breadcrumbs with gluten-free varieties and use gluten-free flour to keep everything safe for those with dietary restrictions. -
How do I know when the chicken is done cooking?
Insert a meat thermometer into the thickest part of the chicken; it should read 165°F (74°C) to be fully cooked and safe to eat.
Satisfying, indulgent, and irresistibly crispy, Golden Crispy Malibu Chicken invites you into a world of comforting flavors that instantly brighten your day. Whether it’s a casual supper or a gathering of friends, this recipe enchants the palate and warms the heart. So roll up your sleeves and try this culinary delight—you won’t be disappointed. Share it with those you love and create memories over a meal that celebrates the joy of home-cooked goodness. Enjoy the crunch, the creaminess, and the delightful flavors, all in one beautiful bite!
Print
Golden Crispy Malibu Chicken
- Prep Time: 15 minutes
- Cook Time: 30 minutes
- Total Time: 45 minutes
- Yield: 4 servings 1x
- Category: Main Course
- Method: Baking and Frying
- Cuisine: American
- Diet: None specified
Description
A savory dish featuring tender chicken breasts wrapped around Swiss cheese and ham, coated in crunchy panko breadcrumbs for a delightful dinner experience.
Ingredients
- 4 boneless, skinless chicken breasts
- 4 slices of ham
- 4 slices of Swiss cheese
- 1 cup panko breadcrumbs
- 1/2 cup all-purpose flour
- 2 eggs, beaten
- Salt and pepper to taste
- Olive oil for frying
- Fresh parsley for garnish (optional)
Instructions
- Preheat your oven to 375°F (190°C).
- Season the chicken breasts with salt and pepper on both sides.
- Place a slice of ham and a slice of Swiss cheese on each chicken breast. Roll tightly and secure with toothpicks.
- Dredge each rolled chicken in flour, then dip into the beaten eggs.
- Roll in panko breadcrumbs until fully coated.
- Heat olive oil in a large skillet over medium heat and fry the chicken rolls for about 3-4 minutes on each side.
- Transfer the browned chicken to a baking dish and bake for 20-25 minutes.
- Remove toothpicks and garnish with fresh parsley before serving.
Notes
For make-ahead tips, prepare the chicken rolls and refrigerate until ready to fry and bake. Customize with different cheeses or add spinach for variation.
Nutrition
- Serving Size: 1 serving
- Calories: 380
- Sugar: 1g
- Sodium: 800mg
- Fat: 18g
- Saturated Fat: 7g
- Unsaturated Fat: 8g
- Trans Fat: 0g
- Carbohydrates: 30g
- Fiber: 1g
- Protein: 30g
- Cholesterol: 160mg