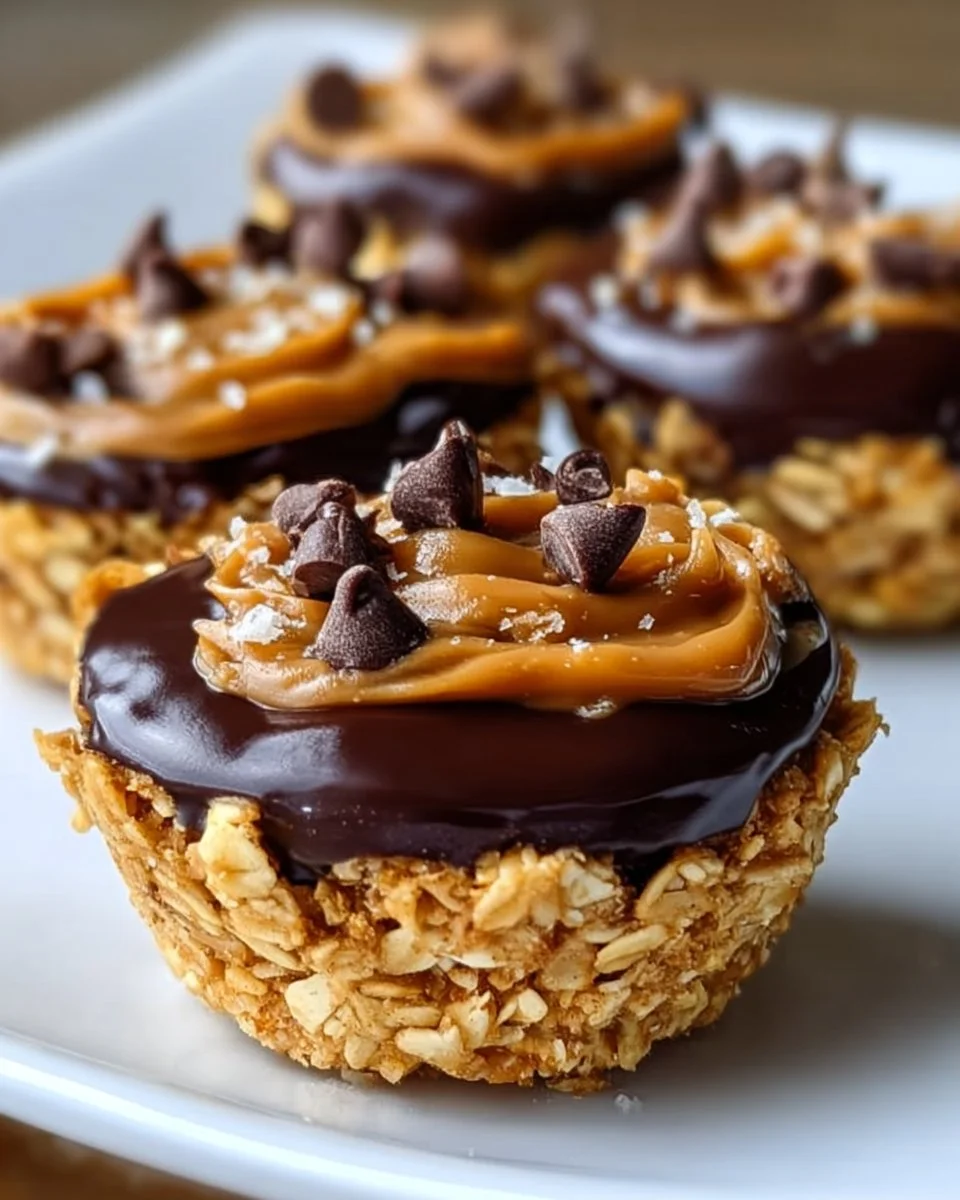
Indulging in a sweet, creamy treat that satisfies your cravings while also offering a wholesome bite is a true culinary joy. Imagine a luscious cup filled with the rich, nutty essence of peanut butter, perfectly balanced by the delightful crunch of granola. As you take that first bite, the flavors mingle and dance on your palate, creating a symphony of textures—from the sturdy granola crumbles to the smooth, velvety peanut butter. Each morsel transports you back to simpler times, evoking warm memories of childhood snacks with a grown-up twist that makes your heart sing.
The aroma wafts through your kitchen, wrapping you in a warm hug. You can almost taste the slight sweetness of honey or maple syrup combining with that pinch of salt—a balancing act that heightens the peanut butter’s quintessential flavor. Imagine serving these scrumptious granola cups at your next gathering, the tantalizing aroma drawing everyone in. Just one glance at their golden brown tops adorned with chocolate chips will spark excitement, while the first bite delivers a satisfying crunch followed by a creamy crescendo. It’s comfort food at its finest—a sweet that feels indulgent yet is packed with wholesome goodness.
Why You’ll Love This No Bake Peanut Butter Granola Cups
These No Bake Peanut Butter Granola Cups offer an irresistible combination that delights both your taste buds and your health-conscious mind. They come together effortlessly—no baking required! Perfect for snack time, they shine as fun after-school treats for kids and sophisticated nibbles for adults. These cups pack in the goodness of oats, offering fiber and whole grains while also delivering a mouthful of flavorful richness from the creamy peanut butter and sweetener.
The beauty of these delightful cups lies in their versatility. You can serve them as a pre-workout boost, a breakfast on-the-go, or simply as a sweet treat to satisfy your cravings without the guilt. They stand out not just for their mouthwatering flavors but also for their simplicity, making them the perfect recipe for anyone—from seasoned bakers to kitchen newcomers.
Preparation Phase & Tools to Use
Before diving into the delightful world of No Bake Peanut Butter Granola Cups, arm yourself with a few essential tools that will make your cooking experience smooth and enjoyable.
- Large Mixing Bowl: A sturdy bowl is vital for combining the ingredients without spills. Choose one that’s easy to mix in and won’t tip over.
- Muffin Tin: This tin serves as your vessel, shaping the cups perfectly. A standard-sized muffin tin works best for uniform portions.
- Cupcake Liners: Opt for colorful or fun liners to add a visual flair. They also help in easy removal and presentation.
- Spatula or Wooden Spoon: A versatile tool for mixing and folding in the chocolate chips. It helps ensure that everything is blended well.
Preparation Tips:
- Measure your ingredients accurately for consistent results.
- If the peanut butter is too stiff, lightly warm it for easier mixing.
- Create an assembly line for efficiency—don’t forget to clean as you go!
Ingredients for No Bake Peanut Butter Granola Cups
- 2 cups granola: Provides the foundational crunch. Choose your favorite blend, or swap in gluten-free granola if needed.
- 1 cup creamy peanut butter: The star ingredient! You can use crunchy peanut butter for extra texture, or swap for almond or cashew butter for a different flavor.
- 1/4 cup honey or maple syrup: A natural sweetener that helps bind the ingredients while adding sweetness. You can experiment with agave syrup as a vegan alternative.
- 1/2 cup chocolate chips: Adds a delightful finish. Use dark or milk chocolate, or even white chocolate, depending on your preference.
- 1/2 teaspoon vanilla extract: This provides a warm, aromatic flavor that deepens the overall taste; ever-so-slightly elevating your cups.
- Pinch of salt: Always enhances sweetness and adds depth to flavor.
How to Make No Bake Peanut Butter Granola Cups
Step into your kitchen and let’s get crafting these delectable treats! Follow these steps for fluffy, rich peanut butter granola cups that will have everyone coming back for seconds.
-
In a large mixing bowl, combine the granola, creamy peanut butter, honey (or maple syrup), vanilla extract, and a pinch of salt. Stir them together until the mixture is smooth and evenly mixed.
- Tip: If the mixture is too thick, warm the peanut butter slightly for easier mixing.
-
Once the ingredients combine, gently fold in the chocolate chips, making sure they’re spread throughout the mixture.
-
Line your muffin tin with cupcake liners, each cup eager to hold its delicious contents. Use a spoon or your hands to fill each liner with the mixture. Press down firmly to pack them well; this ensures they hold their shape once set.
-
Place the muffin tin in your refrigerator for at least 30 minutes, allowing the granola cups to firm up.
-
After chilling, carefully remove the cups from the muffin tin, peeling away the liners. Store them in an airtight container in the fridge to keep their freshness.
Chef’s Notes & Helpful Tips
Crafting the perfect No Bake Peanut Butter Granola Cups can be a joyful adventure. Here are some additional tips to elevate your experience:
- Make-ahead tips: Prepare these cups a day in advance for busy mornings or last-minute gatherings. They keep well in the fridge and become even more delicious as flavors meld.
- Cooking alternatives: If you lack a muffin tin, try shaping the mixture into bite-sized balls or squares on a parchment-lined baking sheet.
- Customization ideas: Go wild with your preferences! Add dried fruits, seeds, or nuts to the mixture for extra texture and flavor. Think cranberries for tartness or chia seeds for a nutrient boost.
Common Mistakes to Avoid
While creating these delicious treats, avoid some common pitfalls that can detract from your final product.
- Skipping the chilling step: Patience pays off! Not allowing the cups to set in the refrigerator can result in crumbly cups that fall apart.
- Using too little binding agent: Be generous with your peanut butter and sweetener! Too little may lead to dry, crumbly cups, while the right amount achieves that perfect texture.
- Incorrect ingredient measurements: Precision matters. Too much granola or not enough peanut butter can upset the balance of flavors and textures.
What to Serve With No Bake Peanut Butter Granola Cups
Pair these delightful granola cups with a variety of accompaniments for a complete experience:
- Fruit: Serve alongside fresh berries or banana slices for a refreshing, natural sweetness—perfect for breakfast!
- Yogurt: A dollop of Greek yogurt provides creaminess and protein, making your treat feel indulgent yet wholesome.
- Chalkboard of Nuts: A simple platter of mixed nuts offers crunch and variety, complementing the soft cup perfectly.
- Milk or Plant-Based Milk: Enjoy a cup of cold milk or your favorite plant-based alternative to enhance each bite.
- Smoothies: Blend up a fruity or green smoothie to balance the richness of the granola cups.
- Coffee or Tea: A warm cup of your favorite brew complements the sweet flavors beautifully, adding a cozy touch.
Storage & Reheating Instructions
Keep your No Bake Peanut Butter Granola Cups fresh and delicious for days! Store them in an airtight container in the fridge, where they’ll maintain their delightful flavor for up to a week.
If you want to enjoy them longer, consider placing them in the freezer, where they can last up to a month. When you’re ready to indulge, simply take one out, let it sit at room temperature for a few minutes, and relish in the comforting flavors that greet you!
Estimated Nutrition Information
These flavorful treats not only tantalize your taste buds but also offer nutritional benefits. Here’s an approximation of the nutrition per cup based on the ingredients listed:
- Calories: 180
- Protein: 5g
- Carbohydrates: 22g
- Fat: 9g
- Fiber: 2g
- Sugar: 7g
Disclaimer: Values may vary based on ingredient brands and specific quantities used.
FAQs
1. Can I use crunchy peanut butter instead of creamy?
Absolutely! Crunchy peanut butter adds a delightful texture to the cups while still providing that delicious peanut flavor.
2. How long do these granola cups last?
When stored properly in an airtight container in the fridge, they last up to a week. If frozen, they can remain tasty for up to a month.
3. Can I make these granola cups vegan?
Yes! Simply substitute honey with maple syrup and ensure your granola is free of animal products.
4. What can I use in place of granola?
You can use puffed rice cereal or oats, but adjust the quantity of sweetener to account for their different textures and flavors.
5. How can I make these cups more decadent?
Consider drizzling melted chocolate over the tops after they’ve set, or adding extra chocolate chips within for a more indulgent treat.
Conclusion
There’s a special joy in creating something that nourishes both body and soul, and these No Bake Peanut Butter Granola Cups do just that. Their perfect blend of creamy and crunchy will leave you eagerly anticipating the next bite, becoming a staple in your snack repertoire. Gather your ingredients, embrace the process, and delight in the wonderful flavors that come together in such a simple and satisfying way. Once you make them, share the love by offering these golden cups at your next gathering or enjoy them quietly just for you—either way, they promise to be a cherished delight. So why wait? Head to your kitchen and bring these scrumptious creations to life!
Print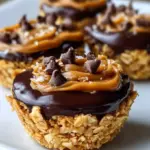
No Bake Peanut Butter Granola Cups
- Prep Time: 15 minutes
- Cook Time: 0 minutes
- Total Time: 30 minutes
- Yield: 12 servings 1x
- Category: Dessert
- Method: No Bake
- Cuisine: American
- Diet: Vegan
Description
Delicious and wholesome no bake peanut butter granola cups that combine the nutty richness of peanut butter with the crunch of granola.
Ingredients
- 2 cups granola
- 1 cup creamy peanut butter
- 1/4 cup honey or maple syrup
- 1/2 cup chocolate chips
- 1/2 teaspoon vanilla extract
- Pinch of salt
Instructions
- Combine the granola, creamy peanut butter, honey (or maple syrup), vanilla extract, and a pinch of salt in a large mixing bowl until smooth.
- Fold in the chocolate chips gently, ensuring they are evenly distributed.
- Line your muffin tin with cupcake liners and fill each liner with the mixture, pressing down firmly.
- Place the muffin tin in the refrigerator for at least 30 minutes to firm up the cups.
- Remove the cups from the muffin tin after chilling, and store in an airtight container in the fridge.
Notes
These cups can be made a day in advance and stored in the fridge. Customize with your favorite add-ins like dried fruits or seeds.
Nutrition
- Serving Size: 1 cup
- Calories: 180
- Sugar: 7g
- Sodium: 50mg
- Fat: 9g
- Saturated Fat: 1.5g
- Unsaturated Fat: 5g
- Trans Fat: 0g
- Carbohydrates: 22g
- Fiber: 2g
- Protein: 5g
- Cholesterol: 0mg